The way your website looks on social media is crucial. You only have a title, a short description and an image to attract viewers attention.
And the first thing they’ll notice, is the image.
So you want the image to represent your page and its content as good as possible but that's not an easy thing to do when you have a website with many pages.
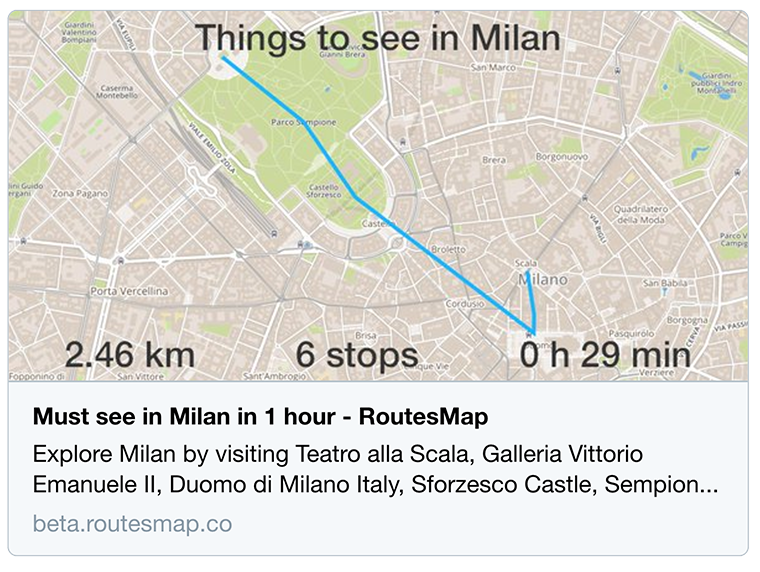
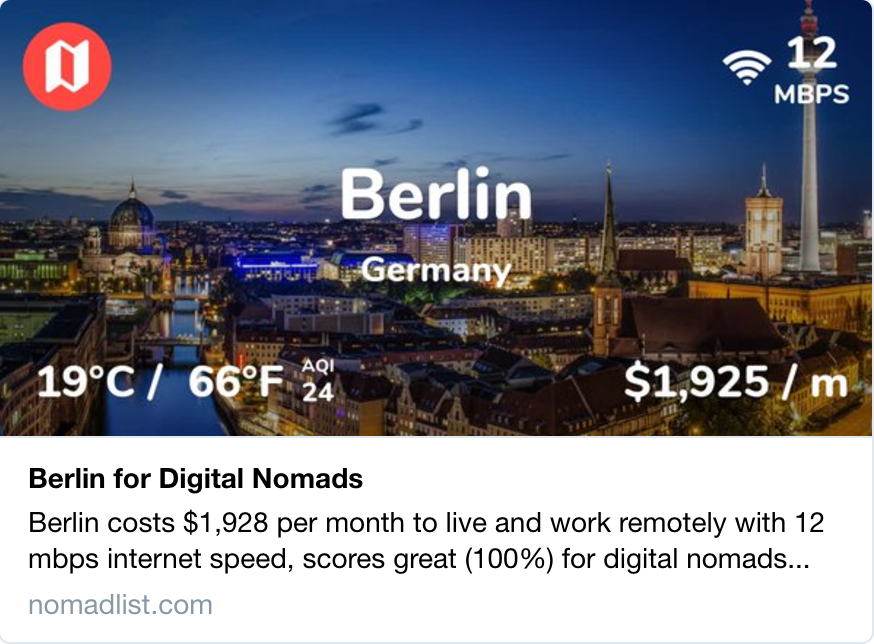
As a great example, take the website nomadlist.com.
Pieter, the founder, created nice images for every page.
Here’s how a city page looks on Twitter:
And here’s my profile page:
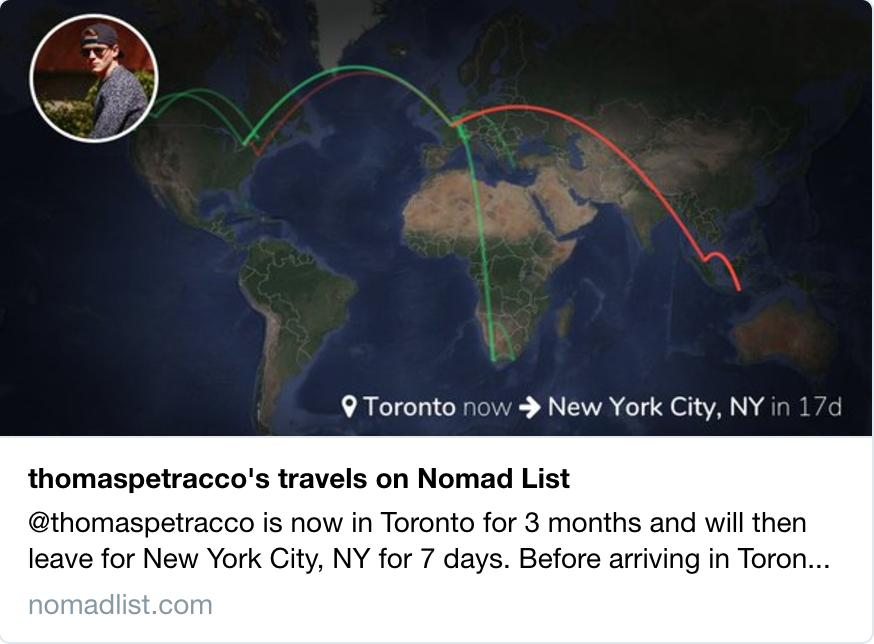
As you can see, the images provide information about the destination page and are more friendly than just a static image.
He obviously didn’t make every single image in Photoshop, so let’s see how we can do this in PHP.
I recently needed to do something similar for routesmap.co so I’ll show you how I went about it.
I use Laravel in this tutorial, but it works the same way if you don’t use a PHP framework.
Process
- Design a webpage that looks like the image you want
- Take a screenshot of that page and save it as an image
- Serve that image as your meta image
Simple!
Requirements
Before starting, we need to see what kind of image we have to create.
From Twitter:
A URL to a unique image representing the content of the page. You should not use a generic image such as your website logo, author photo, or other image that spans multiple pages. Images for this Card support an aspect ratio of 2:1 with minimum dimensions of 300x157 or maximum of 4096x4096 pixels. Images must be less than 5MB in size. JPG, PNG, WEBP and GIF formats are supported. Only the first frame of an animated GIF will be used. SVG is not supported.
From Facebook:
Use images that are at least 1200 x 630 pixels for the best display on high resolution devices. At the minimum, you should use images that are 600 x 315 pixels to display link page posts with larger images. Images can be up to 8MB in size.
We’ll go with a 1280 x 640px resolution and a JPG format.
Designing the page
The idea is to create a web page that will take the full width and height of the browser.
That page will be accessible from a specific URL.
In my example, all my routes have an ID, so I created the URL routesmap.co/route/{id}/preview
Here’s the page design I did:
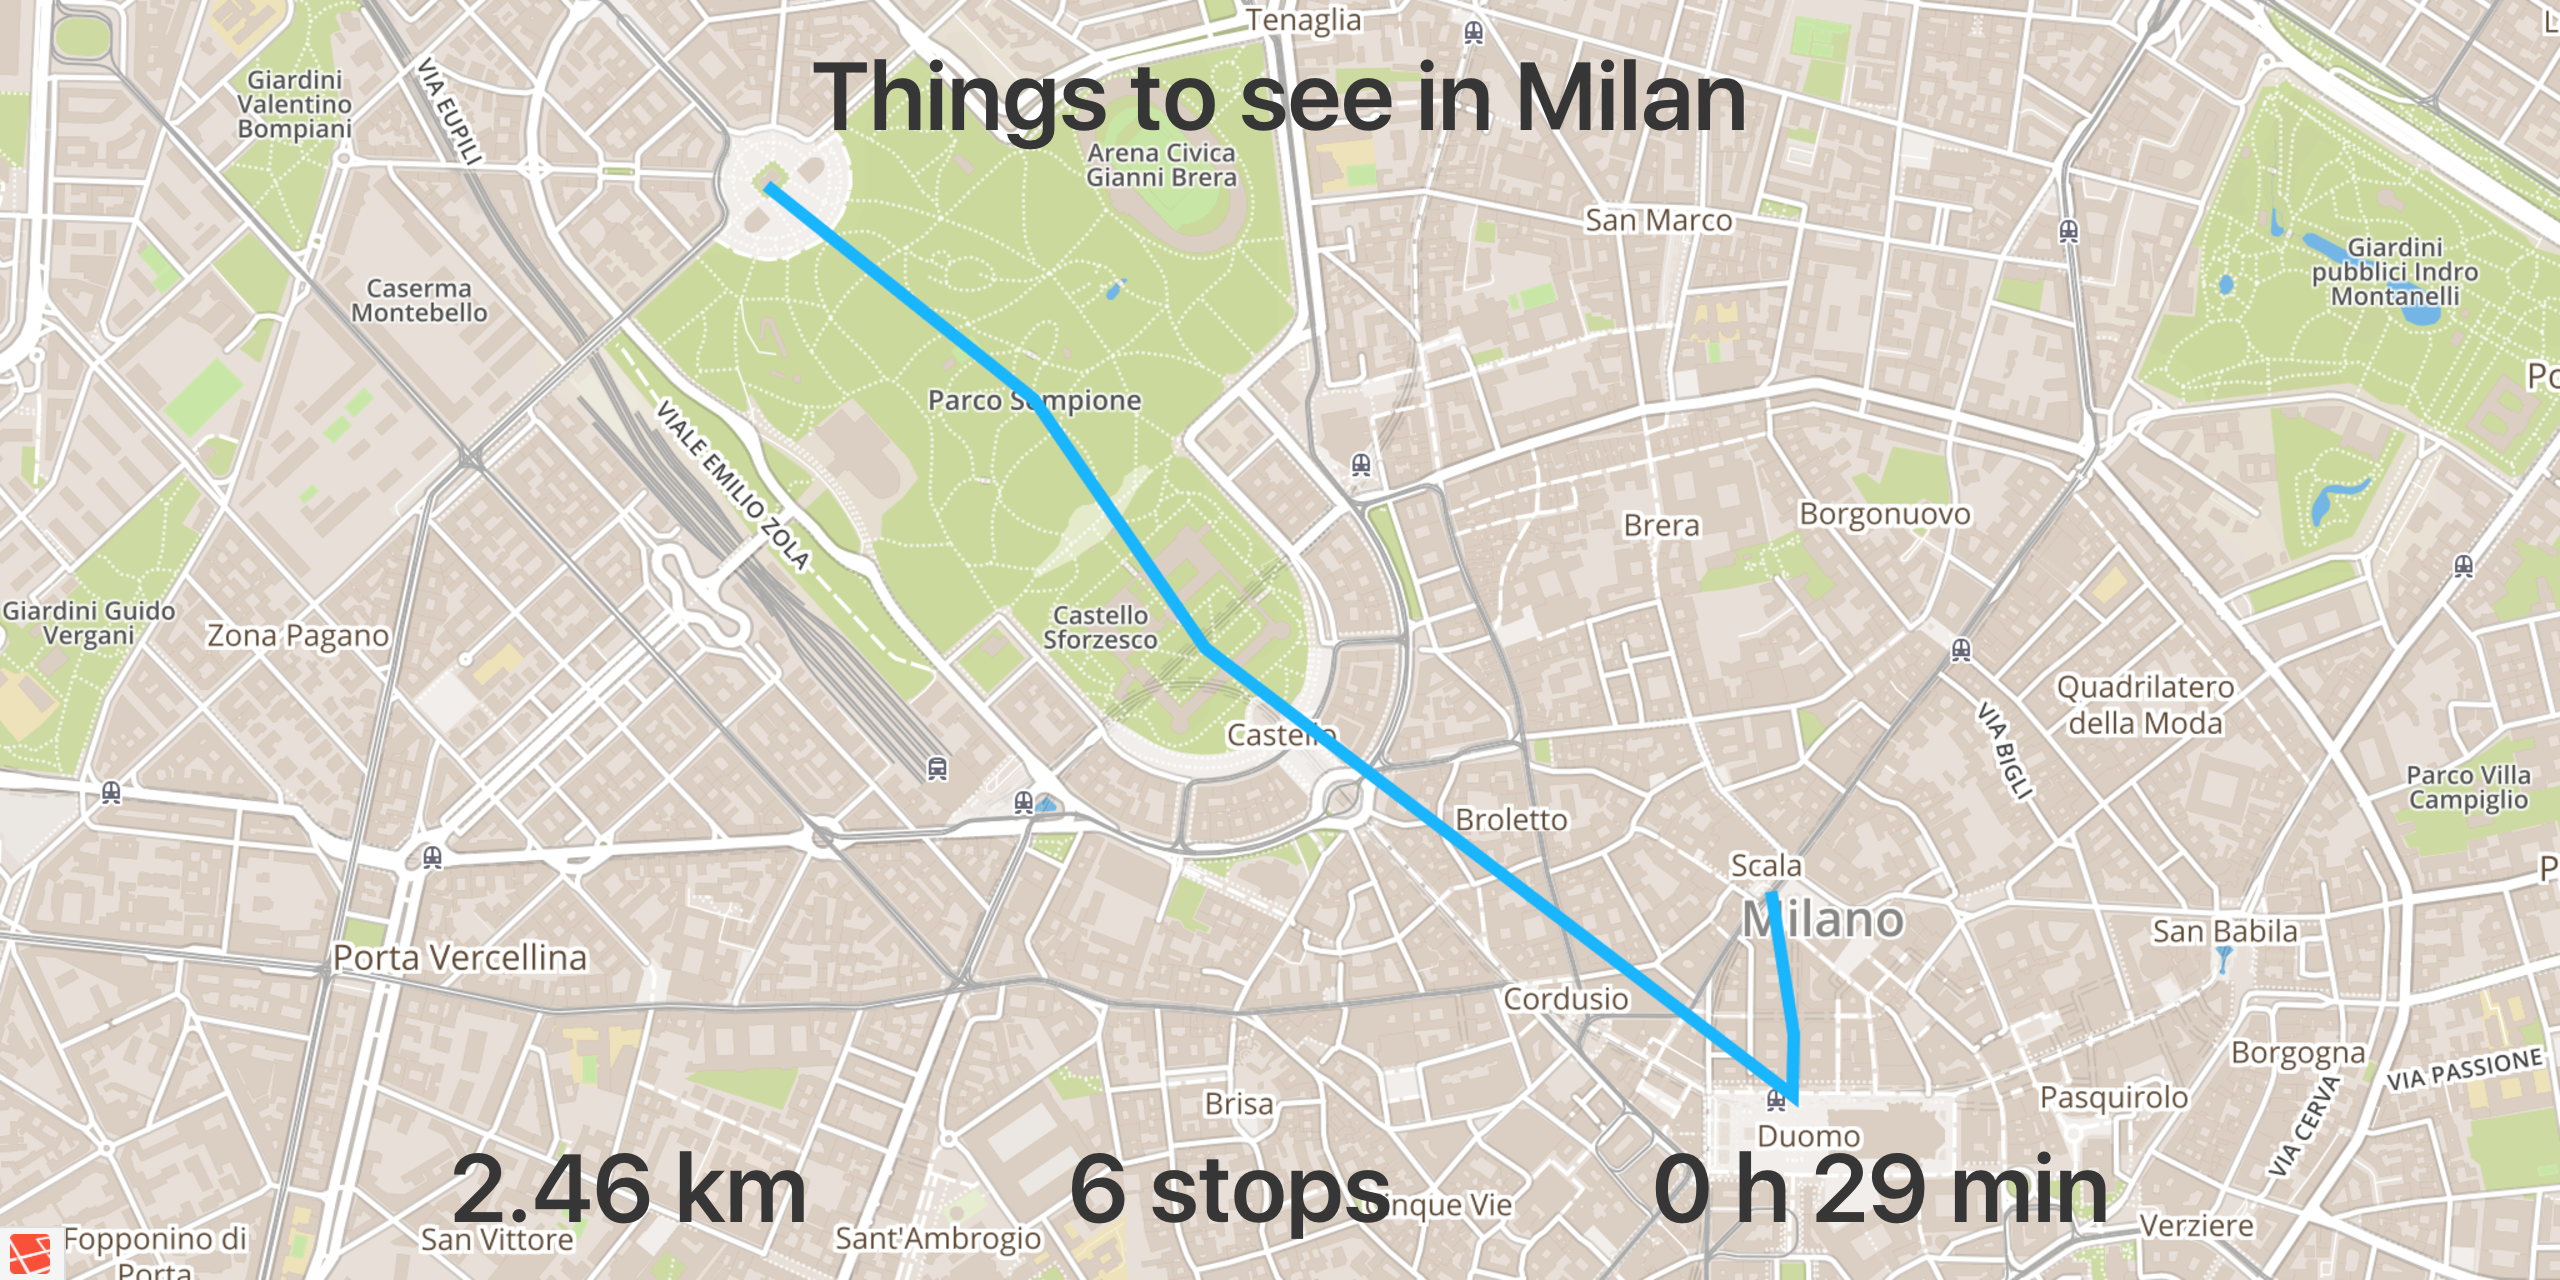
Yes, it’s very simple, I’ll probably do something better later.
I use Bulma as the CSS framework, here’s the code:
<!DOCTYPE html>
<html>
<head>
<title>Preview</title>
<meta name="robots" content="noindex">
<link rel="stylesheet" type="text/css" href="{{ mix('css/app.css') }}">
</head>
<body>
<div id="preview">
<section class="hero is-fullheight" style="background-image: url('images/background.jpg')">
<div class="hero-header">
<div class="container has-text-centered">
<h1 class="title is-1">Things to see in Milan</h1>
</div>
</div>
<div class="hero-body">
</div>
<div class="hero-footer has-text-centered">
<div class="container">
<div class="level">
<div class="level-item">
<p class="title is-1">2.46 km</p>
</div>
<div class="level-item">
<p class="title is-1">6 stops</p>
</div>
<div class="level-item">
<p class="title is-1">0 h 29 min</p>
</div>
</div>
</div>
</div>
</section>
</div>
</body>
</html>
I’ve hardcoded the dynamic values, but of course, you’ll have to replace them with the proper values from your page.
Taking the screenshot
Here's where it gets interesting.
We will use PhantomJS to generate the page and take the screenshot.
To use it in PHP, we’ll need to pull jonnnnyw/php-phantomjs with composer.
composer require jonnyw/php-phantomjs
You’ll also need the bz2 extension for PHP.
I use PHP 7.1, here’s the command I had to do on my server:
sudo apt-get install php7.1-bz2
To keep things clean, I created a Job in Laravel to be able to queue the screenshots and keep the code in a separate file.
php artisan make:job GeneratePreview
Here’s my Laravel job file:
<?php

// App\Jobs\GeneratePreview.php

namespace App\Jobs;

use App\Route;
use JonnyW\PhantomJs\Client;
use Illuminate\Bus\Queueable;
use Illuminate\Queue\SerializesModels;
use Illuminate\Queue\InteractsWithQueue;
use Illuminate\Contracts\Queue\ShouldQueue;
use Illuminate\Foundation\Bus\Dispatchable;

class GeneratePreview implements ShouldQueue
{
    use Dispatchable, InteractsWithQueue, Queueable, SerializesModels;

    protected $route;

    /**
     * Create a new job instance.
     *
     * @return void
     */
    public function __construct(Route $route)
    {
        $this->route = $route;
    }

    /**
     * Execute the job.
     *
     * @return void
     */
    public function handle()
    {
        $client = Client::getInstance();

        // Define the path to the PhantomJS executable
        $client->getEngine()->setPath(base_path('vendor/jakoch/phantomjs/bin/phantomjs'));

        // Tells the client to wait for all resources before rendering
        $client->isLazy();

        // set the width, height, x and y axis for your screen capture:
        $width = 1280;
        $height = 640;
        $top = 0;
        $left = 0;

        // Set the url to the page we want to capture
        $route = url("route/" . $this->route->id . "/preview");

        // Set the path for the image we want to save
        $file = base_path('public/images/routes/' . $this->route->id . '.jpeg');

        $request = $client->getMessageFactory()->createCaptureRequest($route, 'GET');
        $request->setOutputFile($file);
        $request->setViewportSize($width, $height);
        $request->setCaptureDimensions($width, $height, $top, $left);

        // Set the quality of the screenshot to 100%
        $request->setQuality(100);

        // Set the format of the image
        $request->setFormat('jpeg');

        // Set a timeout to exit after 20 seconds in case something wrong happens
        $request->setTimeout(20000);

        $response = $client->getMessageFactory()->createResponse();

        $client->send($request, $response);
    }
}
If you don’t use Laravel, just keep the code from the handle function.
Now, every time someone creates a new route, I just have to dispatch the job!
<?php

// App\Http\Controllers\RouteController.php

use App\Route;
use Illuminate\Http\Request;
use App\Jobs\GeneratePreview;

public function create(Request $request)
{
    $route = Route::create([
        // …
    ]);

    dispatch(new GeneratePreview($route));
}
I’m also dispatching that same job when users update a route, to keep the image up to date.
Serving the image for social sharing
Latest and easiest step, serve the image!
Put these tags in your header and you’re done.
<!-- Twitter -->
<meta name="twitter:image:src" content="http://www.routesmap.co/images/routes/1.jpg">
<!-- Facebook -->
<meta property="og:image" content="http://www.routesmap.co/images/routes/1.jpg">
And tada!